
If you’re a big fan of Monstera deliciosa and love the idea of a scaled-down version for a smaller space (or just because it’s cute), you’ll LOVE this species. There is such a thing as a mini-monstera, and luckily monstera minima care is quite easy, especially if you have experience caring for monsteras and other aroids.
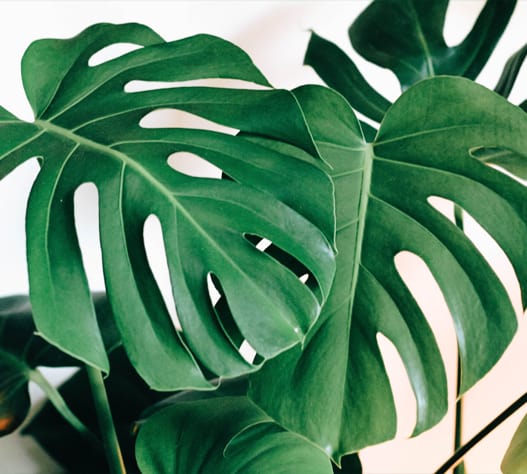
Monstera minima, also known as Philodendron piccolo and Ginny philodendron, isn’t actually a monstera at all! While still a member of the aroid or Araceae family, Rhaphidophora tetrasperma is an entirely different species. It looks very similar to Monstera deliciosa, with its gorgeous heart-shaped, fenestrated leaves.
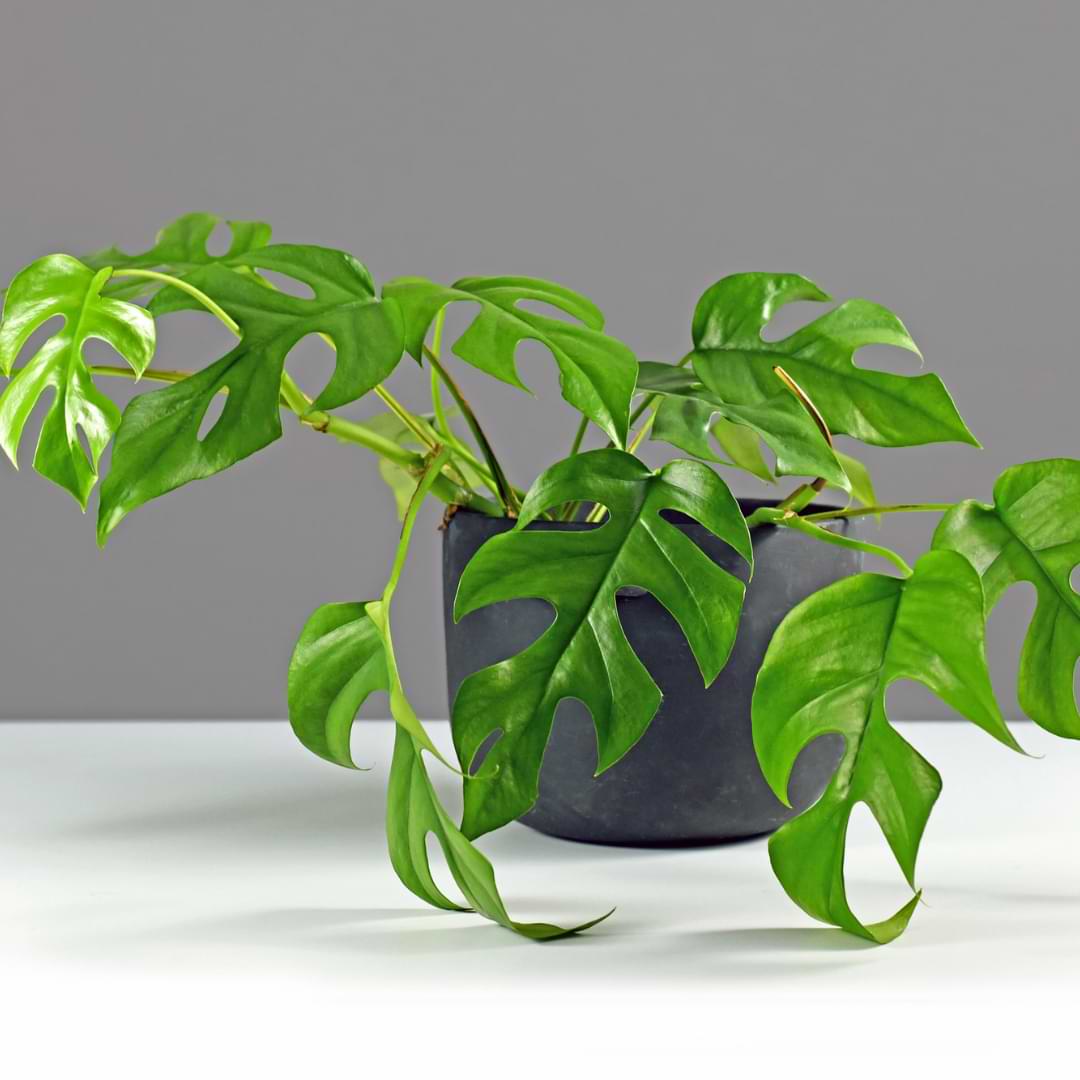
However, monstera minima is much smaller than its larger look-alike. Whereas the deliciosa can grow up to 8 feet tall indoors with 2-foot-long leaves, and will happily take over your space if you let it, monstera minima will top out at about 5 feet tall and will only spread a foot or two. You might find this a lot more manageable in a smaller space with lower ceilings!
This plant also behaves similarly to a monstera because it is a climbing, vining plant that grows in similar tropical conditions. This means that caring for a monstera minima will be no problem if you’ve cared for any other monstera before.
Monstera minima is native to the tropical rainforests of Malaysia and Thailand, so it prefers the light, heat, and humidity you’d find in the tropics. The better you can replicate those conditions indoors, the happier your monstera minima will be!
Here’s everything you need to know about monstera minima care.
Table of Contents
Monstera Minima Care for Beginners
Potting and Soil
Your monstera minima will be happiest in a peaty, fast-draining, slightly acidic soil with a pH of 5.5-7.
Indoor potting mix with a little peat moss and perlite mixed in can do the trick, but we recommend a high-quality mix made especially for aroids to ensure the ideal balance of nutrient content, moisture retention, and drainage.
If you like to make your own potting mixes, we love this recipe from Kaylee Ellen on YouTube.
In a large bowl, mix together:
- 5 parts orchid bark
- 4 parts coir
- 5 parts perlite
- 2 parts activated charcoal
- 2 parts worm castings
If you prefer to buy a potting mix that’s ready to go right out of the bag, we suggest our Premium Monstera Potting Mix because it’s specifically created for monsteras and works beautifully for all aroids, including philodendrons, pothos, peace lilies, and monstera minima!
When looking for a pot, make sure to find one with drainage holes so your monstera minima’s roots aren’t sitting in water. Pick one that’s about 2-3 inches larger than the plant’s root ball so it has a little room to grow.
Monstera minima is a moderate to quick grower, so you’ll probably need to repot every year or so. Plan on going up a pot size every year. You can always root-prune or separate to control its size, but a yearly soil refresh and pot cleaning will do your plant good!
Light
This plant will thrive in indirect sunlight similar to what it would get on the rainforest floor beneath the tree canopy.
Place your monstera minima near a bright window where it will get lots of indirect sunlight for most of the day. Some direct morning sun is okay, but avoid placing it where the hot midday or afternoon sun will shine directly on the leaves, or you might end up with a bunch of burned leaves.
An east-facing window is usually best, but a south- or west-facing window can work if you scoot it back a few feet and/or use sheer curtains to filter the light.
Tip: Keep an eye on your plant’s light conditions throughout the year, because unless you live right on the equator, the sun’s position will shift over the seasons. This means the perfect spot in the summer might become less ideal in the winter when the sun shines at a different angle.
If you aren’t able to provide enough natural sunlight, you can supplement with a grow light.
Monstera minima doesn’t do well in lower light and will become more prone to yellowing and even root rot, so light is crucial for keeping these plants healthy!
Watering
For the healthiest monstera minima, keep the soil evenly damp but not soggy or dried out. Water when the top two inches or so feel dry to the touch or when a moisture meter reads 3-4.
If your pot is draining properly and your plant is getting sufficient light, this should be every 7-10 days.
We highly recommend using a moisture meter because this will give you the most accurate idea of what’s going on inside your plant’s root ball. It’s absolutely possible for the top few inches to feel dry while the root ball is still soaked, especially if your pot isn’t draining properly or if your soil is compacted. A moisture meter will help you know when to water AND help you monitor the quality of your drainage. It’s super handy!
When it’s time to water, slowly add water to the soil until it just starts to drain out the bottom of the pot, then let it drain in the sink or tub for a few hours or empty the drainage tray right away.
You can also bottom water your monstera minima, which has some advantages. Learn more about bottom watering here.
Temperature and Humidity
Remember, these are tropical plants, so warm temperatures and humidity are your friends here.
Indoor temps from 65-85 degrees Fahrenheit work best for a monstera minima. Be sure to keep your plant far away from drafts, heaters, fireplaces, and vents that might freeze, scorch, or dry out the leaves! Be especially conscious of this when the seasons change and you might be using more heat or AC.
Monstera minima is a fan of humidity, so you may want to mist regularly, set up a humidifier nearby, or place your plant on a humidity tray to keep the leaves nice and supple. You can also try bringing your plant into the bathroom when you shower for an occasional steam bath!
Fertilization
These plants grow fairly quickly, so they need a steady supply of nutrients to support healthy growth, strong roots, sturdy stems, and beautiful green leaves!
A healthy monstera minima can easily burn through all the nutrients in its potting soil in just a few months, so it’s best to start fertilizing a month or so after you get your plant. We recommend using a mild liquid fertilizer with an NPK ratio close to 5-2-3.
We highly recommend our Monstera Plant Food fertilizer because it’s perfect for monsteras and aroids in general, and it’s mild enough to use with each watering. This means you won’t have to remember a fertilization schedule, so your plant is more likely to get the right amount of nutrients instead of accidentally being over- or under-fertilized when you get off schedule!
These plants tend to grow most during the spring and summer, so you may want to fertilize with each watering (if you’re using Monstera Plant Food) or a few times a month with another fertilizer. Make sure to follow the directions to ensure that you’re giving your plant the right amount of fertilizer. During the fall and winter, you can cut back to fertilizing half to a third as much.
Pruning and Propagation
Monstera minima grows fairly quickly, so you may want to prune regularly to keep it small, control its shape, or just to propagate with stem cuttings!
It’s best to prune in the spring or summer when your plant will most likely be experiencing a growth spurt. Be sure to use clean tools and hands when pruning to avoid potentially spreading pathogens. If you’re controlling shape or size, you may want to plan your cuts before you actually make them, and mark them with colored string. It’s also a good idea to remove any dead, damaged, or discolored leaves so your plant can direct its energy to supporting healthy leaves and new growth.
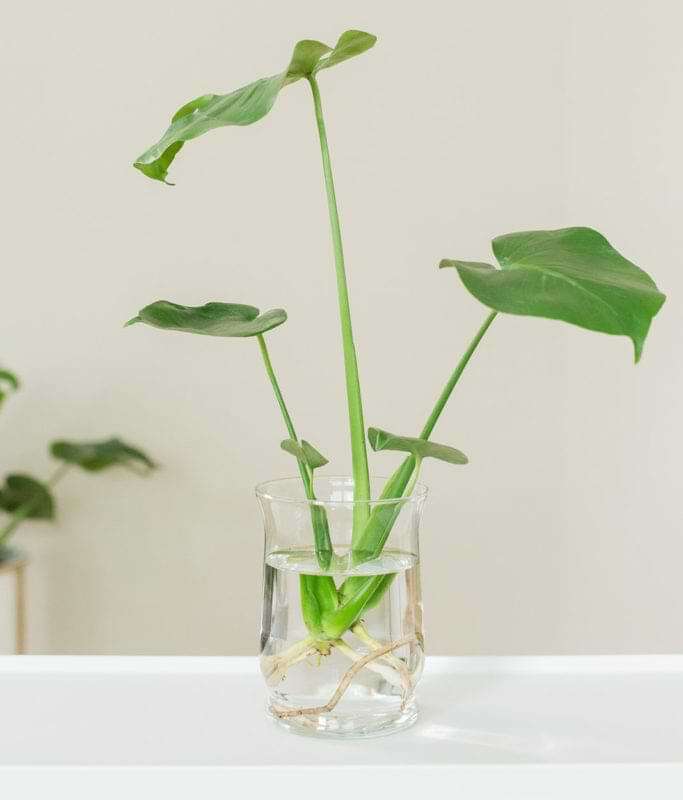
When you’re pruning, make sure to save some healthy cuttings for propagation! To propagate with cuttings, simply make sure your cuttings contain a node (this will be a little brown bump on the stem opposite from a leaf) and place the cut end in a glass of clean water with a little Propagation Promoter. (This encourages faster rooting and wards off infection.) Place in a bright place and change the water regularly. Within a month or two, you should see roots starting to form! When the roots are a few inches long, plant your cutting in soil and care for it like you would a mature monstera minima.
You can also propagate these plants by separation, which is a great idea if you want to control your plant’s size instead of going up a pot size every year.
To do this, carefully unpot your plant by tipping the whole pot on its size and gently coaxing the plant out. Massage the root ball to loosen it and remove as much of the soil as you can. Then carefully untangle the root ball to separate the plant into two or more sections. If the root ball is too tight to untangle, use a clean, sharp knife to cut it apart. Plant the separate sections into smaller pots.
Ta-da! Now you have more plants! It’s normal for your monstera minima plants to get a little droopy after repotting or separating, so put them in a bright place and give them some time. Avoid fertilizing for a month after repotting or separating to give the roots a chance to heal.
Climbing and Supports
Monstera minima is a vining plant that climbs up larger trees in the wild, so it will appreciate a moss pole, trellis, or other support to climb indoors!
You can buy a moss pole or trellis, or easily make your own with this tutorial. This will also prevent your monstera minima from spreading or getting crowded in the pot.
Troubleshooting
These cute plants are fairly easygoing, but like any houseplants, they can develop health problems. Here are some common symptoms to watch out for and what to do about them.
Yellow leaves: This can have a few different causes, so you might need to do some detective work.
First, check the soil. Is it wet or dry? (A moisture meter can come in handy here.) Are leaves yellowing all over the plant, or does the problem seem to be affecting the bottom leaves only?
If the soil is wet and only the bottom leaves seem to be turning yellow, your monstera minima might be overwatered or need more light. If leaves are yellowing all over and the soil is dry, your plant might be underwatered.
Light-brown spots: These can indicate severe underwatering or lack of humidity.
Check for vents nearby that might be drying out your plant, and feel the soil. If it’s dry more than an inch or two down, give your poor plant a drink! You might also want to prune off any dried-out or severely damaged leaves.
Leaves that won’t split: If your plant is more than a year old and putting out heart-shaped leaves with no splits, your monstera minima might need more light! Find a brighter spot for it where it will get bright, indirect light for most of the day. Another option is to purchase a grow light.
Dark-brown stems and leaf spots: If your monstera minima is developing soft, dark-brown spots on the leaves and getting mushy stems, your plant probably has root rot.
If you’re just noticing the problem and it’s not yet severe, make sure the plant is getting plenty of light, ease up on the watering, and use our Root Supplement when you do water to help the roots heal and protect them from further infection.
If the spots continue to spread, repot your monstera minima into a clean pot and fresh soil. Make sure to trim any rotting roots you see. Then put the plant in a bright place and go easy on the water. This will give it a chance to heal.
Insects: If you notice insects, webbing, sticky clear residue, or tiny brown or yellow spots on the leaves, rinse your plant’s leaves in the sink or shower and treat with a neem oil-based product to ward off insects. Our Leaf Armor can also help protect the leaves from insects as well as dust, bacteria, and other debris.
Drooping: This can indicate underwatering, cold, or root shock. If the soil is dry or you notice a draft, temperature or underwatering might be the issue. If you’ve recently moved, separated, repotted, or drastically pruned your plant, it’s probably in shock. Resume whatever care routine made it happy before and be patient. With consistent care, it should perk back up in a week or two!
Browning tips: If the tips or edges of your monstera minima’s leaves are getting brown and crispy, your plant may need more humidity. If that doesn’t seem to be the issue, try switching to distilled water. You can also try letting your tap water sit out overnight before giving it to your plant. This helps the chlorine and any other chemicals can dissipate. Some plants don’t do well with straight tap water.
Add This Honorary Monstera to Your Collection!
Even though monstera minima isn’t technically a monstera, it’s a gorgeous plant that will look amazing in your space and fit in perfectly with your other monsteras and aroids. Give it a try!
Try these other resources to become a monstera plant care expert: