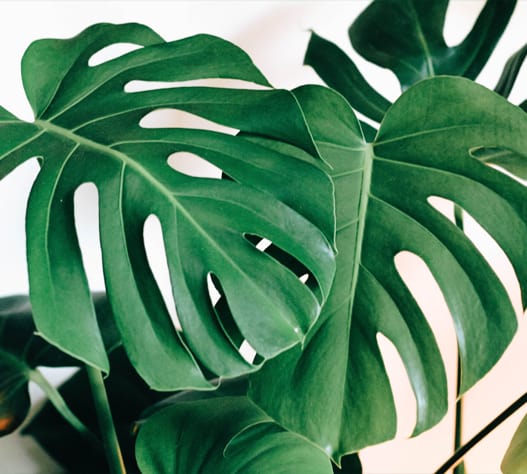


Monstera stem rot is a fungal disease that can severely damage or even kill your monstera if it’s not treated quickly. However, if you catch stem rot before it progresses past the point of no return, you can still save your plant and bring it back to full health.
Prevention is always best, of course, but sometimes those sneaky pathogens slip in anyway and wreak havoc on our poor houseplants. If this happens to you and you notice the telltale signs of stem rot on your monstera, don’t panic. It’s all about identifying the infection early, acting fast, and providing the proper aftercare to help your monstera heal and thrive.
In this article, you’ll learn what monstera stem rot is, what causes it, and how to treat it and save your monstera before it’s too late.
Table of Contents
What Is Stem Rot?
You might be confused about what stem rot actually is, whether it’s the same thing as root rot, what causes it, etc. Sit tight—we’ve got the answers.
Fungus Infection
Stem rot is caused by fungal pathogens present in the plant’s soil. This disease often starts in the roots and works its way up the plant, spreading to the stems and eventually the leaves until the plant completely dies.
Since the disease begins in the roots and the soil, it often affects the bottom of the plant first. This can actually be helpful in identifying the problem, and it also preserves the youngest, healthiest new growth as the older growth dies away.
Now that you know what stem rot is, let’s talk about causes (and prevention).
Causes of Stem Rot in Monstera Plants
So what causes stem rot in monsteras and other plants?
It’s a combination of factors, and luckily most of these are well within your control.
When you understand the causes, you can easily prevent stem rot from wiping out your monstera by creating conditions that allow your plant—but not the fungus—to thrive.
Watering Schedule
The first cause of stem rot is overly wet soil. If you’re watering too often, your soil will be too waterlogged for too long, which creates the perfect conditions for pathogens to thrive and infect your monstera’s roots and stems.
If you’re watering on a strict schedule rather than taking cues from your monstera and the soil conditions, this puts your plant at risk of overwatering and root rot. Throw out the schedule and listen to your plant!
Soil Conditions
The soil you use to pot your monstera can also be a risk factor for stem rot. It’s important to use clean, well-aerated soil that isn’t overly dense. This will go a LONG way in preventing stem rot and a host of other conditions that are caused or exacerbated by soggy soil.
If the soil is too dense, it will hold on to too much moisture for too long, which can cause the overwatering issues we mentioned a moment ago. If your soil is old or compacted, that can also prevent it from draining efficiently.
Also, make sure that you don’t accidentally use moldy soil when you pot your monstera. If you notice fuzzy, moldy-looking stuff or weird discoloration on your potting mix, don’t use it. If this develops later on in your monstera’s soil, repot the plant right away.
Also, avoid potting your monstera (or any plant) into a dirty pot. Make sure to clean pots between plants or use new ones to prevent spreading pathogens from plant to plant.
There’s no way to tell whether your monstera’s soil contains the type of fungal pathogen that causes stem rot, but you can keep this fungus from thriving by maintaining proper soil moisture and taking a few simple precautions to avoid introducing harmful fungi or bacteria to your monstera’s soil.
Temperature
The pathogens that cause stem rot tend to favor warm soil conditions above 70 degrees Fahrenheit, which is pretty average room temperature, and monstera plants do well in these warmer temperatures.
This factor may be harder for you to control, but you can stave off most cases of stem rot by avoiding watering too often and keeping your soil well-aerated so it drains well and is full of air pockets. This will allow the roots to breathe by maintaining proper airflow in the soil and do wonders to keep soil temperatures out of the danger zone.
What’s the Difference Between Stem Rot and Root Rot?
You’ve probably heard of root rot before. And if you’re like most houseplant parents, just reading the words “root rot” probably makes your blood run cold.
So what’s the difference between root rot and stem rot in a monstera?
The answer is…not much. It’s the same disease, but we usually just call it root rot when the infection is confined to the root system. Once the disease progresses farther up the plant, bad news: you’ve officially got stem rot.
If you see the stems rotting, you can bet that the roots are already in trouble. If you can catch root rot in the early stages, you’ll have a much easier time treating it before it reaches the stems, and your plant’s chances of survival will be much higher.
Can Monsteras Recover From Stem Rot?
In many cases, yes.
If you identify the infection early (preferably while it’s only affecting the roots and hasn’t yet progressed to the stems), you can usually save your plant.
But if the stems are already rotting, you’ll have to be much more aggressive with your treatment in order to save your plant. Since the stems are already affected, you most likely won’t be able to save the whole plant. But some is better than none!
If you let the infection go without doing anything, you’ll lose the whole plant in a week or two. It’s best to act fast and save what you can.
Symptoms of Stem Rot
Keep an eye out for symptoms, and if you notice any, act quickly! This infection spreads rapidly and can wipe out your monstera in a week or two if left untreated.
Early detection is key!
So, what are the early symptoms of stem rot/root rot?
Little or No Growth
If your monstera has a health problem, one of the first signs is that it will stop growing because it’s either conserving resources or currently directing its energy toward fighting off an infection.
Slow growth isn’t a sure sign of stem rot, but it can be one of many symptoms you might see. If your plant doesn’t seem to be growing in the spring or summer, that should be your cue to pay close attention to your plant to see what it might need and look out for these other signs.
Note: Slow or stunted growth can also indicate a lack of light, underwatering, overwatering, an insect infestation, or a nutrient deficiency. It’s all about combinations of symptoms, but we’ve got you!
Check out these articles to help you solve the mystery of the missing growth:
4 Signs Your Monstera Needs More Light
4 Signs Your Monstera Is Overwatered
5 Signs Your Monstera Is Underwatered
What’s Wrong With My Monstera? Monstera Leaf Troubleshooting
How to Get Insects OFF Your Monstera
Discolored or Wilted leaves
This fungal disease will often cause soft, dark-brown, or even black spots on leaves or even make entire leaves discolor and wilt. This often affects the lower leaves first, since this infection starts in the roots and works its way up the plant. If you see these symptoms, it’s a good idea to check on the condition of the roots.
Drooping can also have various causes, such as thirst, shock from being moved or repotted, or cold. Check out these other factors if you aren’t sure if root rot is the cause.
Dark & Mushy Roots
If you unpot your plant to check the roots, watch out for roots that are dark, slimy, mushy, or smelly. These are sure signs of rot!
This requires immediate treatment, and we’ll show you what to do with these nasty roots in a minute.
Stem Turning Brown or Black
If your monstera’s stems are darkening or getting soft, this is a sign that the infection has progressed, and you’ll need to act fast if you hope to save your plant.
Again, you’ll want to deal with these discolored stems pronto. We’ll show you how!
Foul Odor From Soil
If your plant is actually rotting, you’ll probably notice a musty, kind of funky odor coming from the soil. If your soil doesn’t pass the sniff test, it’s time to unpot the plant and do some root surgery to save your monstera.
Ready to save your monstera? Good. Here are your next steps!
How to Treat Stem Rot in Monstera?
Now you know the causes, effects, and symptoms of monstera stem rot. So how the heck do you treat it and rescue your plant?!
Here’s what to do:
Step 1: Unpot the plant and clean the roots.
Before you begin, try to find a spot well away from your other houseplants as an added precaution. While it’s not common for pathogens to jump from plant to plant this way, it’s not unheard of. Best to be safe, right?
Carefully remove your monstera from its pot by tipping the whole thing on its side and gently coaxing it out. If it’s really stuck in there, use a butter knife or a trowel to gently lever it out. Whatever you do, DO NOT pull it out by the stems, or you could break them. (This goes for healthy monsteras too. No stem yanking allowed—ever.)
Once your monstera is out of the pot, massage the root ball to remove as much of the old soil as you can. Then rinse the roots with tepid (not cold) water to get rid of the last bits of soil and germs.
Step 2: Prune away the rotting tissue.
Examine the roots carefully, now that they’re cleaned off. If you see any that are mushy, dark, or smell bad, use clean shears or scissors to remove them. (You can wash your shears with soap and water or use rubbing alcohol on a cotton ball. It’s a good idea to wear clean rubber gloves as well, to protect both your hands and your monstera.)
It’s okay to cut above the rotting material and into the healthy tissue here. You want to get rid of all the infected root tissue.
Next, remove any rotting stems or leaves. Again, use clean shears or scissors here, and make sure to sterilize between cuts. The easiest way to do this is with rubbing alcohol on a cotton ball.
When you’ve removed the rotting parts of the plant, throw them away in the trash. Don’t put them in the compost pile, or you risk spreading harmful pathogens to other plants.
Step 3: Repot.
Once you’ve completed surgery on your monstera, it’s time to repot the plant.
It’s important to use fresh, clean soil that drains well to prevent the problem from returning. Our Premium Monstera Potting Soil is a great choice, and you can also make your own potting mix from scratch using this great recipe.
You’ll want to use a clean pot too. You can scrub out the old pot with soap and water or use a brand-new pot. Whichever you choose, just make sure the pot has drainage holes and it’s not more than 2-3 inches larger than your monstera’s root ball. If the pot is too big, it can hold on to more water than your monstera can use, and that’s the LAST thing you want when your plant is recovering from root rot that’s partially caused by overly moist soil.
Pot up your monstera, leaving about 2 inches of headroom at the top, and give it a gentle watering. Add a little more soil to the top to compensate for any shrinkage.
Step 4: Aftercare
Once you’ve repotted your monstera, put it in a spot with plenty of bright, indirect sunlight. This might be its previous position or a new one if you’ve determined that its old spot wasn’t bright enough.
Adequate light will really speed up the healing process here, so make sure you’ve got a nice, sunny, east-facing window, a spot by a south- or west-facing window where the sun’s rays won’t fall directly on the leaves, or a grow light if you aren’t able to provide enough natural light.
As your plant heals, let the soil dry out a bit more than you normally would between waterings. You do NOT want super moist soil right now.
Water when the top 3 inches or so of potting mix feels dry to the touch or when a moisture meter reads 3. We strongly recommend investing in a moisture meter, by the way, because this can give you a much clearer idea of the soil’s moisture level deeper down in the root ball. After all, it’s possible for the top layer of soil to be dry while the root ball is still wet. This is especially true if your soil isn’t well-aerated.
This clear picture of your soil moisture levels can also help prevent further root infections.
Here’s the meter we recommend. It also measures soil pH and light levels, so it’s even more bang for your buck!
When you do water, we highly recommend using our Root Supplement, which will boost your plant’s immune system and prevent the infection from returning or spreading while the roots heal.
Note: Avoid fertilizing your monstera for a month or two after repotting and root pruning. The roots will be extra sensitive during this time and more prone to chemical burn. The nutrients present in the new soil should provide plenty of nutrition for your plant (for the next few months anyway) so you won’t need to supplement.
Monstera Stem Rot: Final Thoughts
Monstera stem rot/root rot can be very dangerous for your plant and a pain for you to treat.
Luckily, it’s largely preventable. Even if the offending pathogen is present in the soil, it may not progress to full-on root or stem rot if you take care to cultivate conditions that don’t allow the fungus to thrive.
To sum up, here’s what you can do to prevent monstera stem rot:
Don’t overwater your plant. Make sure your pot and soil drain well and that you water only when the top 2-3 inches of soil feel dry or when a moisture meter reads 3-4. (A soil meter is your best friend when it comes to preventing stem rot!)
Make sure your monstera is getting enough light. Fungus thrives in darkness and dampness, and sunlight prevents both. Put your plant in a bright spot where it will get at least eight hours of bright, indirect sunlight per day. Even a little direct light before 10:00 a.m. can be helpful. (Just avoid direct light after 10:00 a.m. by placing the plant farther back or filtering the light with a sheer curtain.)
Avoid spreading pathogens. When you pot your monstera, take a moment to inspect the soil to make sure there’s nothing weird growing in it. Make sure to use only clean pots.
When you prune your plant, use sterilized tools and clean gloves.
Keep infected houseplants away from other plants to keep the fungus as confined as possible.
Inspect your plant regularly for warning signs of stem/root rot, as well as any other indicators that your plant may be unhappy and suffering from watering issues, insect infestations, etc.
Give your plant a thorough once-over at least once a week. Watering day is a good time to do this. This is also a great way to bond with and get to know your plant. With a little practice, you’ll start to understand your plant and notice what it likes and what it doesn’t, so you’ll be able to catch and treat problems early!
These four simple steps will go a long way in preventing stem rot and keeping your monstera healthy in general.
You’ve got this! This site is full of articles and resources to help you take the best possible care of your monstera so it can grow up to be healthy and beautiful, and bring more life and color to your space for years to come.
For more monstera resources, be sure to check out our helpful community on Facebook!