

Move over, Monstera Borsigiana Albo and Thai constellation! There’s a new variegated monstera variety that’s taking the houseplant world by storm. Monstera Aurea Marmorata Variegata, although a mouthful, is a stunning lemon and lime-colored monstera is making waves with indoor plant lovers everywhere.
Table of Contents
What Is Monstera Aurea Marmorata Variegata?
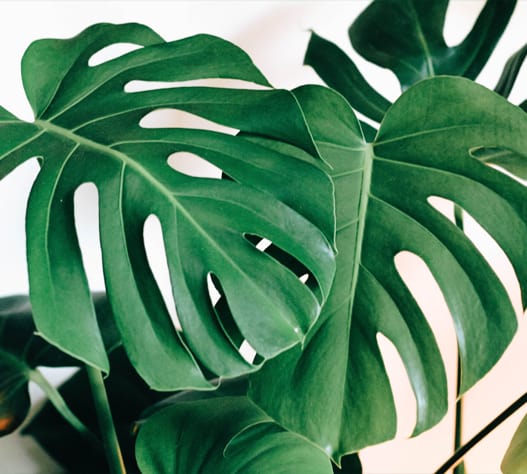
Monstera Aurea is a smaller, variegated cultivar of the classic variegated Monstera deliciosa.
The yellow, light-green, and dark-green variegation occurs in a similar pattern to what you’d expect to find on Monstera Albo, with blocks and splashes of variegation and some leaves that are solidly half and half.
Other Names for Monstera Aurea
This (like many plants) goes by several names. You might find this plant listed as any of the following:
- Monstera Marmota
- Monstera Aurea Variegata
- Variegated Monstera Aurea
How Rare Is Monstera Aurea?
At the time of this writing, Monstera Aurea is still quite rare and might be tricky to find online. (You can forget about finding these in garden centers, by the way.)
They’re up and coming, so this may change, but currently they are harder to find than white-and-green variegated monsteras but not as rare as the elusive Monstera obliqua.
How Much Does Monstera Aurea Cost to Buy?
At the moment, you’re looking at $250-$3,000, depending on plant size and maturity.
You can expect to pay at least $250 for a cutting, and up to several thousand dollars for a healthy, well-established plant with many leaves.
Is Monstera Aurea Stable?
Variegation is a spontaneous mutation that only occurs in some plants, so you cannot grow a variegated monstera, including Monstera Aurea, from seed. All Monstera Aurea plants are grown from cuttings or tissue cultures of other variegated plants.
However, you may have success propagating this plant with a cutting, as it’s said to root more readily than other variegated monstera varieties and almost always continues to produce variegation on new leaves.
Monstera Aurea Variegata Care Guide
Variegated monstera varieties are more challenging to care for than non-variegated varieties (this is part of why they’re so expensive!), so we recommend attempting this only if you’re experienced with taking care of houseplants, especially aroids and preferably other monstera or variegated plants.
Here’s everything you need to know about caring for Monstera Aurea.
Light and Position
Proper lighting is one of the most important parts of taking care of Monstera Aurea (and any variegated plant) because, due to the lack of chlorophyll, the plant will need more sunlight to convert into energy through the process of photosynthesis. However, the lack of chlorophyll also means that the leaves will be more photosensitive and prone to scorching.
It’s a catch-22! This lighting quandary is one reason why dramatic variegation doesn’t occur often in the wild. The perfect lighting conditions can be hard to come by!
So make sure to provide your Monstera Aurea with plenty of bright but indirect sunlight. This is super important. You want the brightest light you can get without the sun’s rays actually shining on the leaves (though a little early morning sun is usually fine).
An east-facing window is usually your best bet. A south- or west-facing window can work if you use a sheer curtain to filter the sunlight, but keep a close eye on your plant if you try this to watch for scorching.
If you aren’t able to provide enough natural sunlight, a full-spectrum grow light can help. (We like these bulbs that fit into regular light fixtures.) Make sure your plant gets at least 8 hours of bright light per day.
Temperature and Humidity
These are tropical plants that make their home in the rainforest, so they do best in fairly warm and humid conditions.
Temperatures between 65-85 degrees Fahrenheit are best for Monstera Aurea. Most indoor spaces maintain these temperatures, so you probably won’t have to do anything special with the thermostat to keep your Aurea happy. Just keep it away from any drafty doors or windows, heaters, or air conditioning vents that might freeze, burn, or dry out the leaves.
Try to keep humidity levels around 40% for your Monstera Aurea to keep the leaves nice and supple.
If you live in an arid climate or use a lot of indoor climate control, you may need to create a more humid environment around your Aurea. You can set up a humidifier nearby, place your plant in a well-lit kitchen or bathroom (these tend to be the most humid areas of a house), group it with other plants (this can increase local humidity as the plants respire) or place a smaller Aurea on a humidity tray. You can purchase these at any gardening center or just DIY it by filling a shallow tray with water and pebbles and setting the plant on top. This will create some upward humidity when the water evaporates (just don’t let the roots or soil touch the water!).
Water
Watering your Monstera Aurea properly is also a non-negotiable part of its care. These plants like consistently moist soil, but they don’t like to dry out or sit in soggy soil for too long.
As a rule of thumb, water when the top 2-3 inches of soil feel dry to the touch or when a moisture meter reads 3-4. We highly recommend using a meter because it will give you a much better picture of what’s happening deeper in the pot. After all, depending on how well-aerated your soil is, the top layer of potting mix can be bone-dry while the root ball is still soggy!
Here’s the meter we like and how to use it to test your monstera’s soil. It also measures light and soil pH levels as an added bonus!
If your soil is in good condition and if your Aurea is getting enough light, you should be watering every 7-10 days, ideally. But check the soil every few days and take cues from your plant instead of following a strict schedule. This will especially come in handy when the seasons change, as many houseplants, Monstera Aurea included, may have different watering needs at different times of the year when growth habits and lighting conditions tend to change.
When it’s time to give your Aurea a drink, slowly add water to the soil and let the pot drain completely, emptying the drainage tray immediately. This plant also responds well to bottom watering (usually—each plant is an individual!), but if you choose to water this way, make sure to top water every third or fourth time to flush excess nutrients left over from fertilizing the soil.
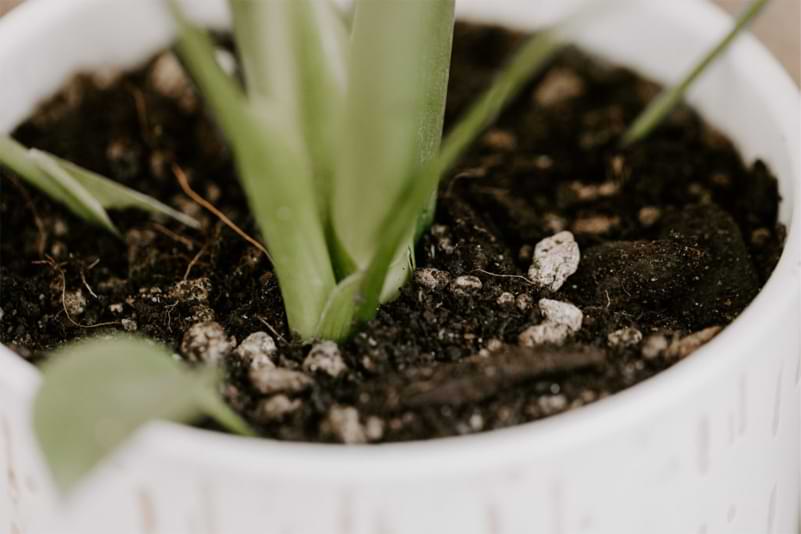
Soil Conditions
Make sure to pot your Monstera Aurea in a peaty but well-aerated soil that drains quickly and has a fairly neutral pH level of 5.5-7. Since these plants are epiphytic and don’t actually require a lot of soil to grow in nature, they like a lot of airflow around their roots. If their soil is too dense, the roots can easily suffocate or drown if the potting substrate is too wet.
For a quick solution, you can use regular cactus soil with a few handfuls of peat moss and some extra perlite mixed in.
If you’re a DIY houseplant owner and like to make your own potting mixes from scratch, try this great recipe from Kaylee Ellen (her YouTube channel has all kinds of great tips):
- 5 parts orchid bark
- 4 parts coir
- 5 parts perlite
- 2 parts activated charcoal
- 2 parts worm castings
If you want a great option that’s ready to go right out of the bag, our Premium Monstera Potting Soil is a great choice for your Monstera Aurea as well as any other monstera or aroid plants!
This potting mix perfectly balances moisture retention and drainage ideal for monstera plants, has a neutral to slightly acidic pH (just like monsteras like it), and packs a nutritional punch to start your Monstera Aurea off on the right foot!

Fertilizer
Fertilize your Monstera Aurea regularly during the growing season with a gentle liquid fertilizer. An N-P-K ratio of 5-2-3 is ideal for promoting the growth of healthy foliage and strong roots.
In nature, monstera plants get all the nutrients they need from the soil they’re rooted in, and even from the surface they’re growing on. Your potted Monstera Aurea only has access to the nutrients already in its potting soil, and a growing plant can easily use up all the available nutrients within a few months. This means that you’ll need to add nutrients to your Monstera Aurea’s soil so it can continue to grow and function optimally.
We recommend our Monstera Plant Food because it’s specifically formulated for monstera plants, including Monstera Aurea, and is so gentle that you can use it with every watering. That way, you won’t have to remember a fertilizing schedule! You can just mix a little in your watering can every time you water and you’re good to go. After all, the best fertilizer is one you’ll use, right?
Overfertilizing
While your Monstera Aurea does need nutrients, it’s also possible to give your plant too much fertilizer. If this happens, you might notice a layer of white, crusty stuff on the surface of the soil, brown spots on the leaves, or drooping.
If you accidentally overfertilize your Aurea, don’t panic; it’s reversible (though discoloration on the leaves and stems is not).
First, use a spoon to remove as much of the crust from the surface of the soil as you can. Then put the pot in a sink, shower, or bathtub and slowly add water to the soil, letting it drain completely. Do this two or three times. This process is called “leaching” and should help flush the excess minerals from the soil.
Repotting your plant and pruning away any burned roots can also be a good solution, especially if your soil is too compacted for effective leaching (and if that’s the case, it’s probably time to repot into fresh soil anyway!).
Potting and Repotting
Monstera Aurea, like other variegated monstera varieties, might not grow as quickly as non-variegated monsteras, but it should still grow steadily and therefore need to be repotted every year or so. It’s also a good idea to repot if the soil becomes hard and compacted because this can lead to problems with watering and airflow around the roots.
Repotting is simple. Try to do it in the spring, if possible, when your monstera is likely to experience a growth spurt. To repot, tip the pot on its side and use a trowel or knife to carefully lever it out. NEVER pull the plant up by the stems. Massage the root ball to break it up and remove as much of the old soil as possible. This is especially important if the soil has hardened.
Once the plant is out, add a few handfuls of soil to the bottom of your new pot (which should have drainage holes and be about 2-3 inches larger than the old pot), then place your monstera upright in the pot and fill in the sides with soil. Water thoroughly and add more soil to the surface to account for settling.
Resume whatever position and care that made your plant happy before (though you should hold off on fertilizing for at least a month after repotting) and give your plant a chance to recover. A bit of shock and drooping is normal here, but it should go away after a week or two.
Pruning
You may need to occasionally prune your Monstera Aurea to control its size and shape, or to remove damaged material.
The best time to prune is in the spring when your plant is actively growing and will recover more easily.
We suggest planning your cuts before you make them and marking them with colored tape or string. When you’re ready to cut, wear gloves to protect your hands from the monstera’s irritating sap, and put down a towel or tarp to protect your furniture and floor. Use sterilized shears to prevent spreading pathogens to your plant.
If you’re pruning away healthy material to control your Aurea’s size, don’t throw those cuttings away! You can use them to grow more Monstera Aurea plants for free!
Propagating
Propagating is lots of fun and fairly easy with these plants. You can propagate your Aurea with rooting cuttings (like the ones you might have just pruned off your plant) in water or soil or by air layering.
Here’s how!
Monstera Aurea Cuttings
The most popular way to propagate is with cuttings.
Before you take cuttings, make sure to wait until your plant is mature enough to propagate. We know it’s tempting to start propping soon, but seriously, wait until you have plenty of big, healthy leaves and some good nodes. You don’t want to risk shocking your plant before it’s established enough to recover quickly.
It’s also a good idea to do this in the spring and take advantage of those growth hormones your plant is already creating.
To take a cutting, locate a section with at least one fairly young, healthy leaf and a node (this will look like a little bump on the stem opposite from a leaf). Using sterilized shears, cut beneath the node so that your cutting includes the node and at least one good leaf.
Soil
To root your cutting in soil, plant the cutting upright in a container of potting mix like the ones we described earlier and water thoroughly. You can also add a little Propagation Promoter to the water to encourage rooting and discourage infection.
Place the cutting in a bright place with lots of indirect light and keep the soil evenly damp but not soggy. Within a few months, your cutting should have grown some roots! At this point, you can keep it in its container or transplant it to a more permanent planter.
Water
To root in water, place your cutting upright in a clear glass of water and Propagation Promoter. Place in a bright place, changing the water out every week and keeping it topped off in between.
Your cutting should start growing roots in a few weeks! Once those roots are an inch long, you can pot the cutting in soil and care for it like a mature plant.
Air Layering
Air layering encourages your propagation to grow new roots while still on the main plant.
To do this, locate an area with a few healthy leaves and a node. Then use clean shears to make a small cut in the stem right next to the node, about ¼-⅓ of the way through the stem. Dab the wound with some Propagation Promoter on a cotton ball, then wrap it in damp (but not soggy) sphagnum moss. Wrap the moss loosely in plastic wrap and secure the whole thing with string.
Every day or so, loosen the plastic and use a spray bottle to remoisten the moss. Within a month or two, you should see new roots growing from the cut! When the roots are an inch long, cut below them so that they’re included on the cutting, and plant your new cutting in soil.
Common Problems
You might run into problems with your Monstera Aurea. Watch for these warning signs!
Pests
Your plant might encounter trouble with thrips, spider mites, mealybugs, and scale, insects which can quickly suck the juices out of your plant’s leaves—so it’s important to act fast!
Treatment for Pests
Check out these articles for identifying and treating various pests that might plague monstera plants.
- Scale on Monstera | How to Identify and Treat
- Thrips on Monstera | How to Identify and Get Rid of Them
- How to Get Insects OFF Your Monstera
In general, the best course of action is to remove as many insects as possible with a kitchen sprayer, lint roller, or your fingers, and then spray the plant with diluted neem oil, Leaf Armor or an insecticide. You may need to do this a few times over a couple of weeks to get rid of the pests completely.
Brown Tips
Brown tips can often indicate that your plant needs more humidity. If you notice this, try our suggestions in the section on temperature and humidity.
If that doesn’t seem to be the issue, make sure you’re not letting the soil get too dry between waterings. Remember, water when the top 2-3 inches feel dry or when a meter reads 3-4.
If that still doesn’t seem to be the problem, consider switching to distilled or purified water instead of tap water. Your plant may be having a reaction to the chlorine, fluoride, or other chemicals present in many local tap waters.
Drooping Leaves
Drooping can have many causes and may not require intervention.
If you recently moved or repotted your plant, it might be experiencing shock. Leave it alone and allow it to adjust. It should perk up in a few weeks!
Drooping can also be caused by cold, overwatering, underwatering, overfertilizing, and insects. Use the process of elimination as you examine your plant and its conditions to determine the cause. When you find it, adjust your care routine as needed.
Yellow Leaves
Leaves can yellow for many reasons, so use the process of elimination again here.
Is your plant overwatered? Underwatered? Getting too much or too little light? Do you have an insect problem? Examine the plant and its conditions, using a moisture meter or light meter as needed, to pinpoint and fix the cause.
Monstera Aurea FAQ
What is the difference between Albo and Aurea?
Both of these plants are cultivars of Monstera deliciosa; the main difference is the coloring. Monstera Albo is typically white or cream and dark green while Monstera Aurea is dark and light green and yellow.
How do you encourage variegation in Monstera?
First, make sure that you start with a variegated plant. While non-variegated varieties can sometimes produce some spontaneous variegation, you’re better off starting off with a plant or cutting that’s already variegated.
Next, make sure that you provide enough light so that your plant can afford to produce leaves that have less chlorophyll (i.e., dark-green coloring) and more yellow, white, or light green.
Other than that, consistent proper care is the best way to raise a healthy, highly variegated Monstera Aurea!
Monstera Aurea: Final Thoughts
Monstera Aurea is a beautiful plant that can bring a burst of unusual color and style to your space. As far as variegated plants go, it’s fairly easygoing and a must for any variegated monstera fanatic!
To learn more about monstera growth and troubleshooting monstera care, visit these resources: